如何快速建立連結
此範例因為測試需求,使用的是Google Apps Script,如果要正式使用可使用其他方式如firebase或自定義伺服器完成以下教學。
大致流程如下:
sequenceDiagram
    User->>DMflow: 您好
    DMflow-->>User: 您好,您尚未綁定帳號
    User->>DMflow: 綁定帳號
    DMflow-->>User: 提供綁定帳號網址
    User->>Login: 點擊綁定帳號網址
    User->>Login: 輸入帳號密碼
    Login-->>User: 資訊正確提供LINE帳號連接網址
    User->>Login: 點擊LINE帳號連接網址
    Login->>LINE: 告訴LINE這個使用者要綁定
    LINE-->>DMflow: accountLink event
    DMflow->>User: 告知使用者已經綁定帳號
步驟一:建立需求的檔案
首先我們先建立index.html
<!DOCTYPE html>
<html>

<head>
  <base target="_top">
  <style>
    body {
      font-family: Arial, sans-serif;
      text-align: center;
      padding: 20px;
    }

    h1 {
      margin-top: 0;
    }

    input[type="text"],
    input[type="password"] {
      width: 200px;
      padding: 10px;
      margin: 10px;
    }

    button {
      padding: 10px 20px;
      background-color: #4CAF50;
      color: white;
      border: none;
      cursor: pointer;
    }

    button:hover {
      background-color: #45a049;
    }
  </style>
</head>

<body>
  <h1>Login</h1>
  <input type="text" id="username" placeholder="Username" autocomplete="off" required><br>
  <input type="password" id="password" placeholder="Password" autocomplete="off" required><br>
  <input type="hidden" id="linkToken" value=""><br>
  <button onclick="login()">Login</button>
  <a href="#" id="account-link" style="display: none;">Account Link</a>
  <script>
    function login() {
        var username = document.getElementById("username").value;
        var password = document.getElementById("password").value;
        var linkToken = document.getElementById("linkToken").value;
      }
  </script>
</body>

</html>
程式碼.gs
function doGet(request) {
  return HtmlService.createHtmlOutputFromFile("index");
}
步驟二:開始撰寫gs
我們需要login的邏輯並開始撰寫
先開啟Google spreadsheets並建立欄位為username, password, nonce, user_id
可以填寫你要的使用者,我在裡面建立了帳號為howard、密碼為123456
| username | password | nonce | user_id |
|---|---|---|---|
| howard | 123456 |
根據網址,即可拿到你的Spreadsheet的ID,記得如果只要使用Login頁面,可以將存取只能給自己使用,但因為此範例最後面需要用到DMflow的資源節點,所以需要開放給所有知道連結的人。
https://docs.google.com/spreadsheets/d/{{你的Spreadsheet ID}}/edit#gid=0
function login(username, password, linkToken) {
  var id = '{{你的Spreadsheet ID}}';
  var spreadsheet = SpreadsheetApp.openById(id);
  var sheet = spreadsheet.getSheets()[0];
  var data = sheet.getDataRange().getValues();

  for (var i = 1; i < data.length; i++) {
    var storedUsername = data[i][0];
    var storedPassword = data[i][1];
    if (storedUsername === username && storedPassword == password) {
      var nonce = createNonce(16);
      var cell = sheet.getRange("C" + (i + 1));
      cell.setValue(nonce);
      var redirectUrl = `https://access.line.me/dialog/bot/accountLink?linkToken=${linkToken}&nonce=${nonce}`;
      return { success: true, redirectUrl };
    }
  }
  return { sucess: false };
}


function createNonce(length) {
  var text = "";
  var possible = "ABCDEFGHIJKLMNOPQRSTUVWXYZabcdefghijklmnopqrstuvwxyz0123456789";
  for (var i = 0; i < length; i++) {
    text += possible.charAt(Math.floor(Math.random() * possible.length));
  }
  return text;
}
並更改index.html
  <script>
    function login() {
        var username = document.getElementById("username").value;
        var password = document.getElementById("password").value;
        var linkToken = document.getElementById("linkToken").value;
        google.script.run.withSuccessHandler(handleLoginResult).login(username, password, linkToken);
      }
      function handleLoginResult(result) {
        if(result){
          if(result.success){
            alert("Login successful!");
            if(result.redirectUrl) {
              var linkElement = document.getElementById('account-link');
                  linkElement.style.display = "inline";
                  linkElement.href = result.redirectUrl;
            }
          }else {
            alert("Login failed! Please check your credentials.");
          }
        }
      }
      google.script.url.getLocation(function(location) {
        var hiddenValue = location.parameter["linkToken"];
        document.getElementById("linkToken").value = hiddenValue;
      });
  </script>
即可完成簡單的登入頁面。
此為index.html完整版
<!DOCTYPE html>
<html>

<head>
  <base target="_top">
  <style>
    body {
      font-family: Arial, sans-serif;
      text-align: center;
      padding: 20px;
    }

    h1 {
      margin-top: 0;
    }

    input[type="text"],
    input[type="password"] {
      width: 200px;
      padding: 10px;
      margin: 10px;
    }

    button {
      padding: 10px 20px;
      background-color: #4CAF50;
      color: white;
      border: none;
      cursor: pointer;
    }

    button:hover {
      background-color: #45a049;
    }
  </style>
</head>

<body>
  <h1>Login</h1>
  <input type="text" id="username" placeholder="Username" autocomplete="off" required><br>
  <input type="password" id="password" placeholder="Password" autocomplete="off" required><br>
  <input type="hidden" id="linkToken" value=""><br>
  <button onclick="login()">Login</button>
  <a href="#" id="account-link" style="display: none;">Account Link</a>
  <script>
    function login() {
        var username = document.getElementById("username").value;
        var password = document.getElementById("password").value;
        var linkToken = document.getElementById("linkToken").value;
        google.script.run.withSuccessHandler(handleLoginResult).login(username, password, linkToken);
      }
      function handleLoginResult(result) {
        if(result){
          if(result.success){
            alert("Login successful!");
            if(result.redirectUrl) {
              var linkElement = document.getElementById('account-link');
                  linkElement.style.display = "inline";
                  linkElement.href = result.redirectUrl;
            }
          }else {
            alert("Login failed! Please check your credentials.");
          }
        }
      }
      google.script.url.getLocation(function(location) {
        var hiddenValue = location.parameter["linkToken"];
        document.getElementById("linkToken").value = hiddenValue;
      });
  </script>
</body>

</html>
步驟三:寫入userId
有兩種方式寫入userId
- 1.直接在轉login的頁面的時候,可以直接攜帶userId
- 2.透過DMflow資源節點去觸發寫入userId
在此舉立第二種範例。
我們在 程式碼.gs新增以下程式碼
將新增一個資源。
{
  "action": "updateUserId",
  "userId": "xxxx",
  "nonce": "xxxx"
}
function writeUserId(userId, nonce) {
  var id = '{{你的Spreadsheet ID}}';
  var spreadsheet = SpreadsheetApp.openById(id);
  var sheet = spreadsheet.getSheets()[0];
  var data = sheet.getDataRange().getValues();

  for (var i = 1; i < data.length; i++) {
    var storedNonce = data[i][2];
    if (storedNonce === nonce) {
      var cell = sheet.getRange("D" + (i + 1));
      cell.setValue(userId);
      return { success: true };
    }
  }
  return { sucess: false };
}

function doPost(e) {
  var param = JSON.parse(e.postData.contents);
  let action = param.action;
  var result = {};
  if (action === 'updateUserId') {
    let userId = param.userId;
    let nonce = param.nonce;
    result = writeUserId(userId, nonce);
  }
  return ContentService.createTextOutput(JSON.stringify(result))
    .setMimeType(ContentService.MimeType.JSON);
}
於是可以先新增部屬作業。
步驟四:回到DMflow做設定
我們先來看最終成果圖。
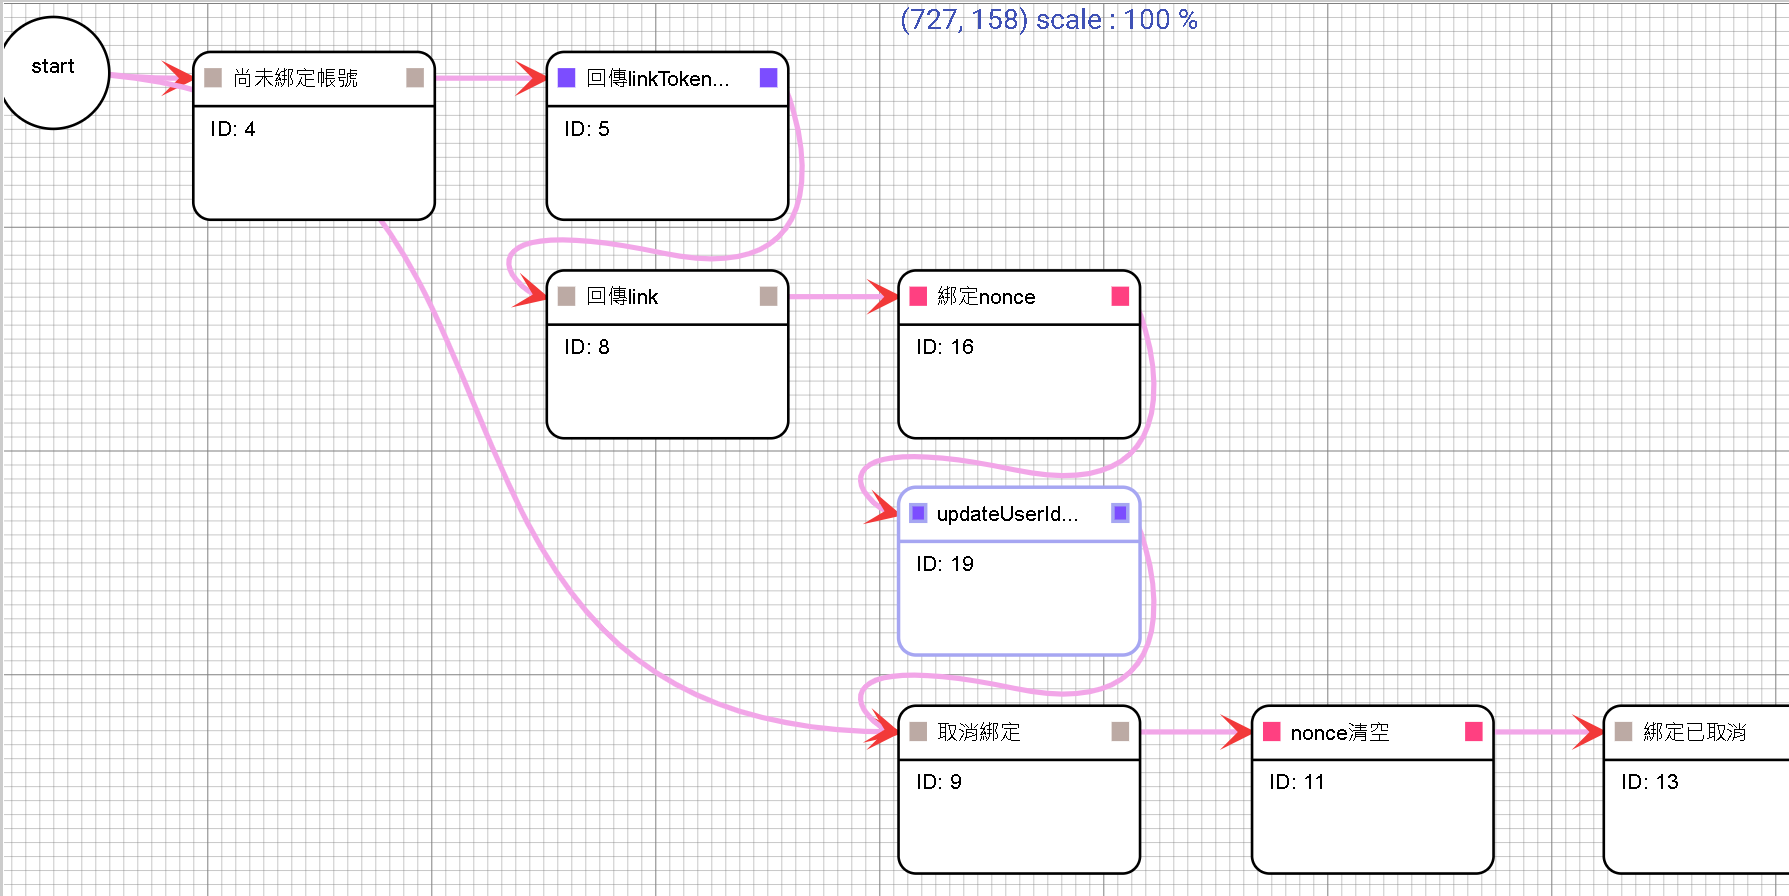
首先現在"使用者參數"新增一個nonce作為是否已經連接帳號的根據。並在"機器人參數"新增lineToken,數值為Bearer {{line access token}}
先建立變數節點
- link_token: 屬性: string,用途是呼叫LINE linkToken後需要回傳linkToken
- nonce: 屬性: string,用於查詢user Spreadsheet的nonce去比對帳號。
- user_id: 屬性: string,用於修改user Spreadsheet的userId。
在資源節點新增兩個分別是
- line_linkToken 用於綁定帳號
因預設為HTTPS所以不用打https://
Request URL: api.line.me/v2/bot/user/${#sys_user.userId}/linkToken
Method: POST
Content-Type: JSON
Headers: Authorization: config.lineToken
RESPONSE
{
 "linkToken": "xxxx"
}
- updateUserId 用於更新userId
Request URL: script.google.com/macros/s/{{生產部屬的ID}}/exec
Method: POST
Content-Type: JSON
REQUEST PAYLOAD:
{
    "action": "updateUserId",
    "nonce": "",
    "userId": ""
}
請求參數新增nonce和user_id(請求參數鍵要改成userId,否則無法取代REQUEST PAYLOAD的userId)
RESPONSE
{
 "success": true or false
}
填寫完後點擊新增或修改,重進一次修改資源,可以點擊測試直接測試該資源。
- 回到DMflow圖形
每個節點的用途可以從這裡了解。DMflow 機器人對話流程
ID 4 回覆節點 用途:為了回覆使用者未綁定帳號的問句。
文本:尚未綁定帳號
選項:綁定帳號(回傳文本:綁定帳號)
Start -> ID 4 條件節點 用途:平台必須是LINE且nonce屬於尚未填充的狀態。
條件為
  sys_user.platform = constant @line
  user.nonce 未填充
ID 5 資源節點 用途:向LINE Server去拿取linkToken。
選取line_linkToken
回傳值:
  link_token->conversation.linkToken
ID 4 -> ID 5 條件節點 用途:假設回覆等於綁定帳號則移動到綁定帳號節點。
條件為
  query = constant 綁定帳號
ID 8 回覆節點 用途:拿到linkToken後顯示前端login頁面,並帶linkToken數值。生產部屬的ID為自己的ID請勿複製貼上。
文本:https://script.google.com/macros/s/{{生產部屬的ID}}/exec?linkToken=${#conversation.linkToken}
ID 5 -> ID 8 條件節點 用途:假設拿到linkToken直接前往回覆輸出連結。
條件為無條件
ID 16 變數節點 用途:我們接收到Account Link事件後可以拿到nonce。
user nonce 字串取代 前綴:conversation,目標:_message.payload.nonce
ID 8 -> ID 16 條件節點 用途:當前端登入完成且完成帳號連結後,LINE Server會提供給DMflow 事件為Account Link的事件。
條件為
  conversation._message.type = constant accountLink
ID 19 資源節點 用途:調用updateUserId將nonce相符的帳號更新他的userId
選取updateUserId
參數:
  nonce->user.nonce
  user_id->sys_user.userId
回傳值:
  success->conversation.success
ID 16 -> ID 19 條件節點 用途:Account Link事件後可以拿到nonce和result,可以先判斷result是否為ok或failed,但此範例不判斷。 條件為無條件
ID 9 回覆節點 用途:最後需要顯示解除綁定的訊息。
文本:已綁定帳號
選項:取消綁定(回傳文本:取消綁定)
Start -> ID 9 條件節點 用途:使用者回答取消綁定且渠道為LINE的時候觸發
條件為
  query = constant 取消綁定
  sys_user.platform = constant @line
ID 11 變數節點 用途:將user.nonce清除
user nonce 字串清空
ID 9 -> ID 11 條件節點 用途:當使用者選擇選項為取消綁定或直接說出取消綁定的時候觸發。
條件為
query = constant 取消綁定
ID 13 回覆節點 用途:用於回覆使用者綁定已取消了,下一次使用者需要重新綁定才能繼續問話。
文本:綁定已取消
關閉等待用戶回覆
步驟五:測試
在LINE整合填寫Channel ID和secret和access token,可參考DMflow LINE整合
並根據開發版、生產版做發布即可測試。可參考DMflow 發布
成果:
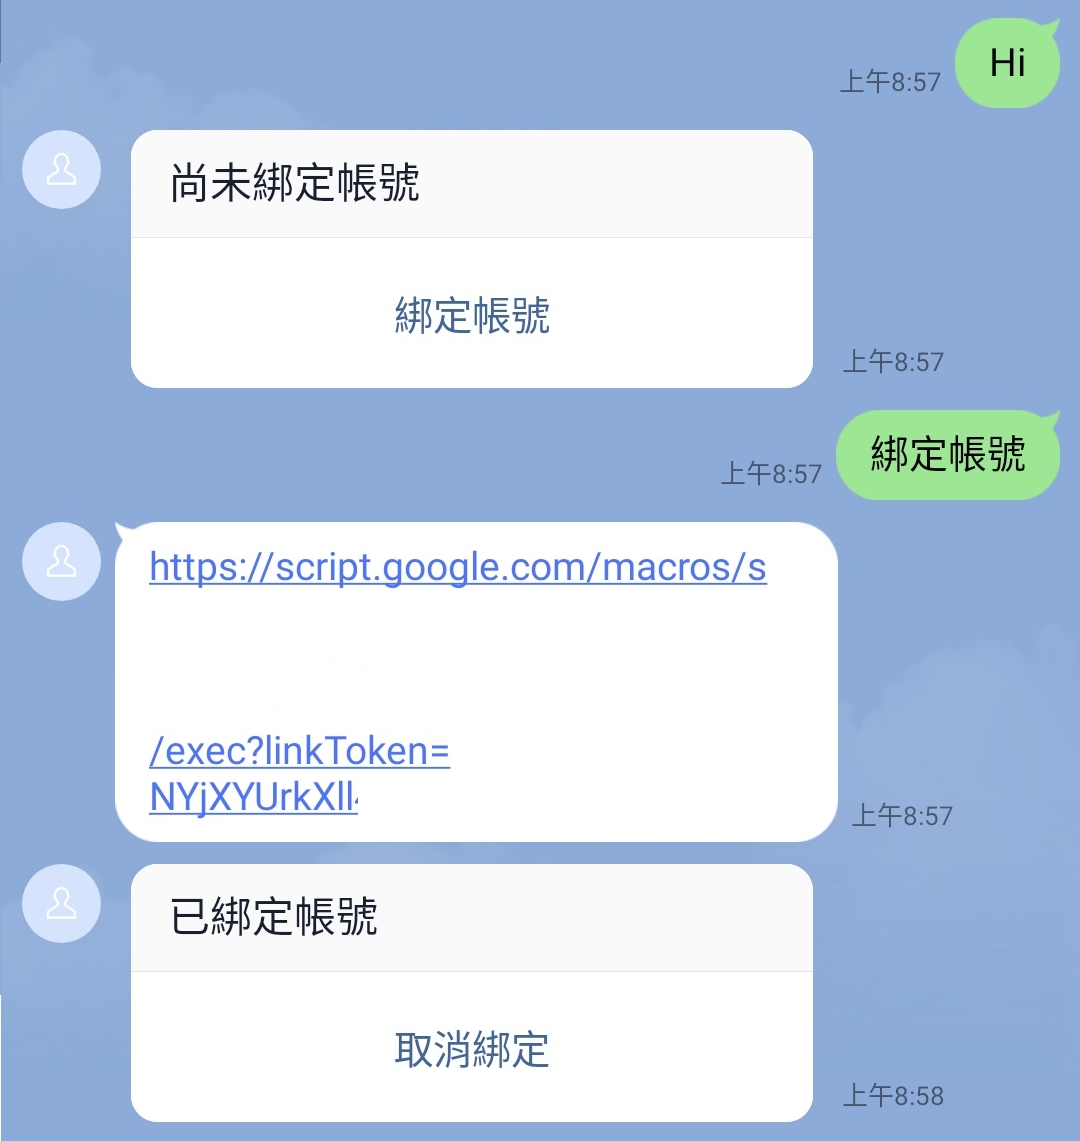
點擊連結後跳去登入頁面。
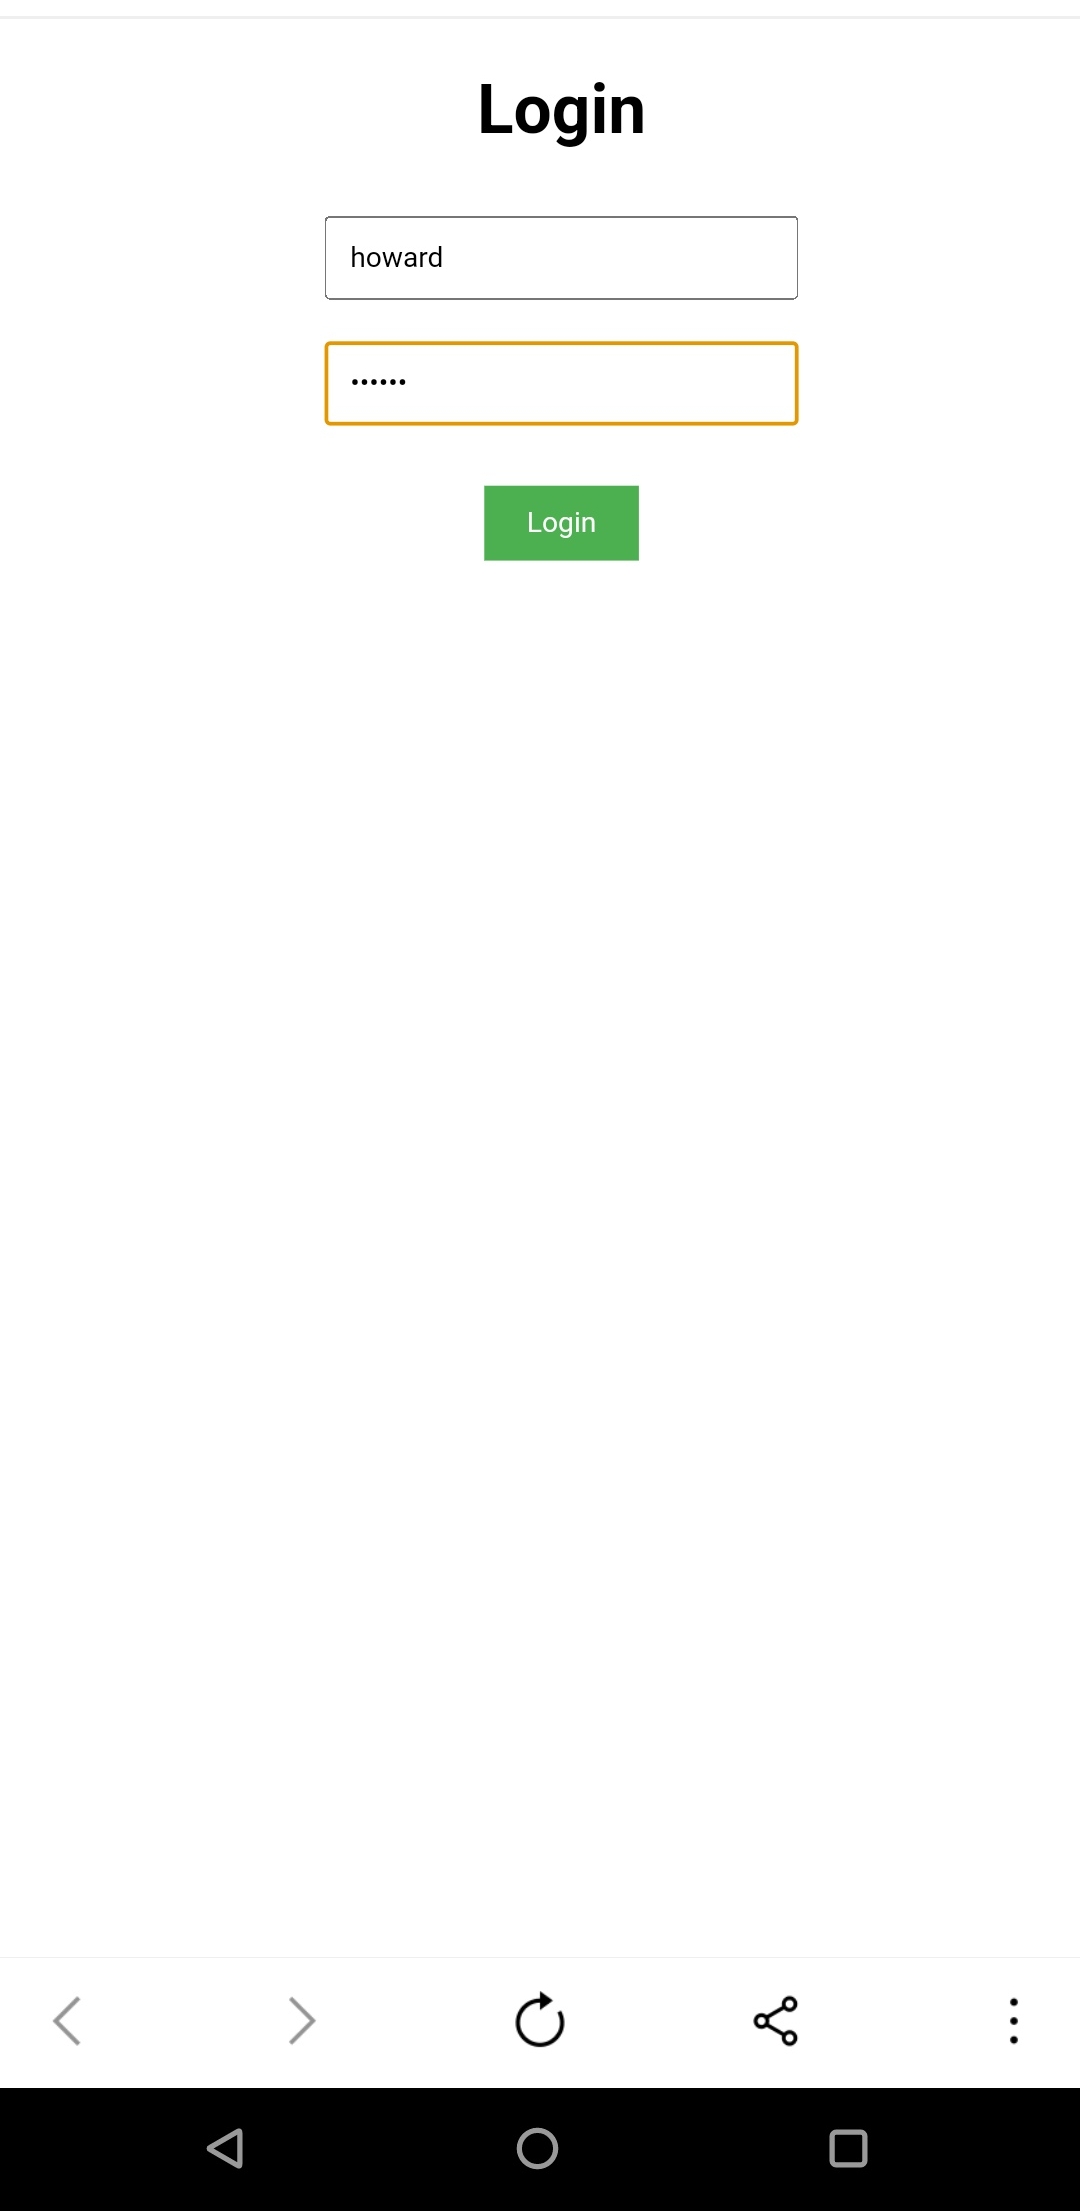
登入成功後顯示Account Link的連結
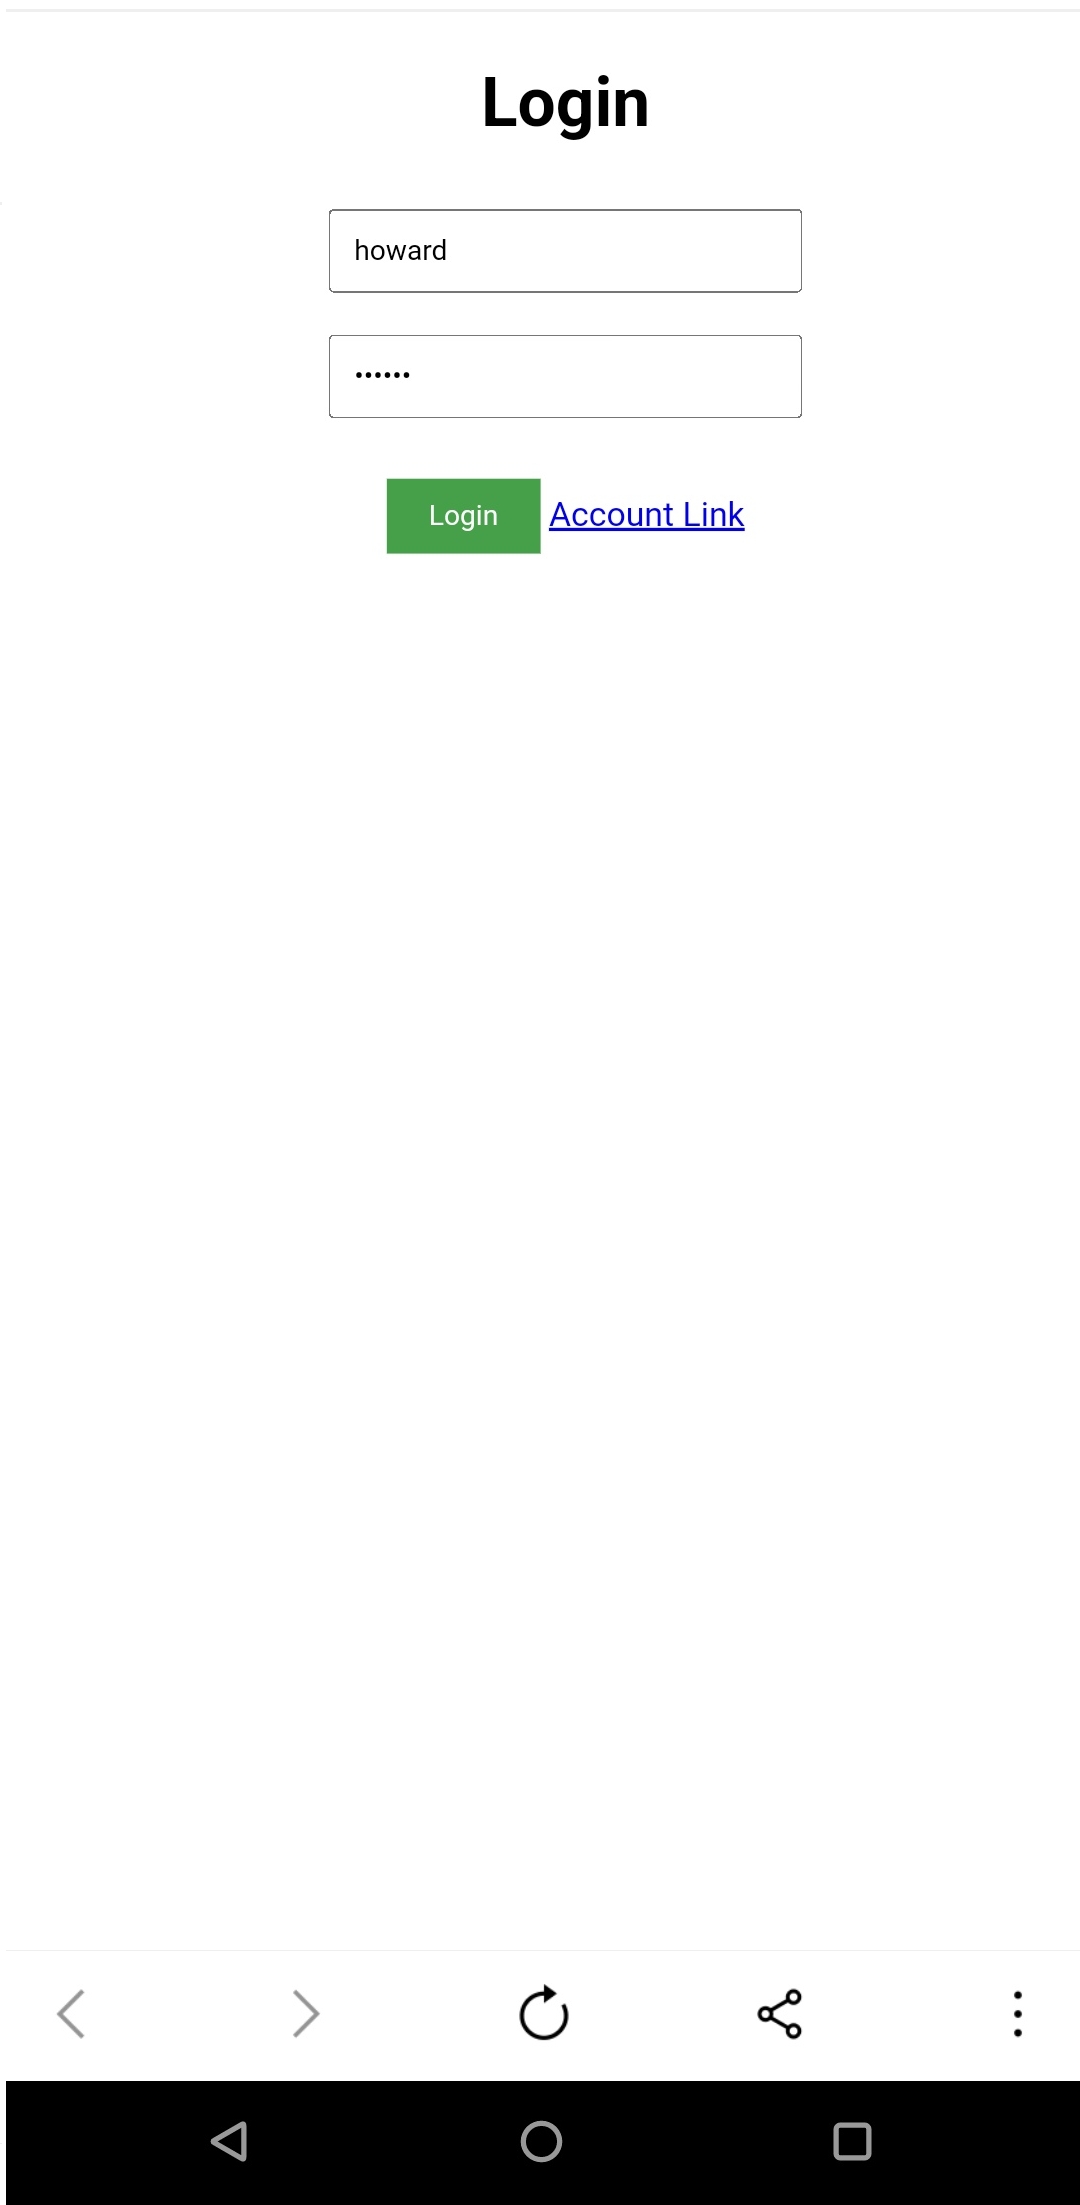
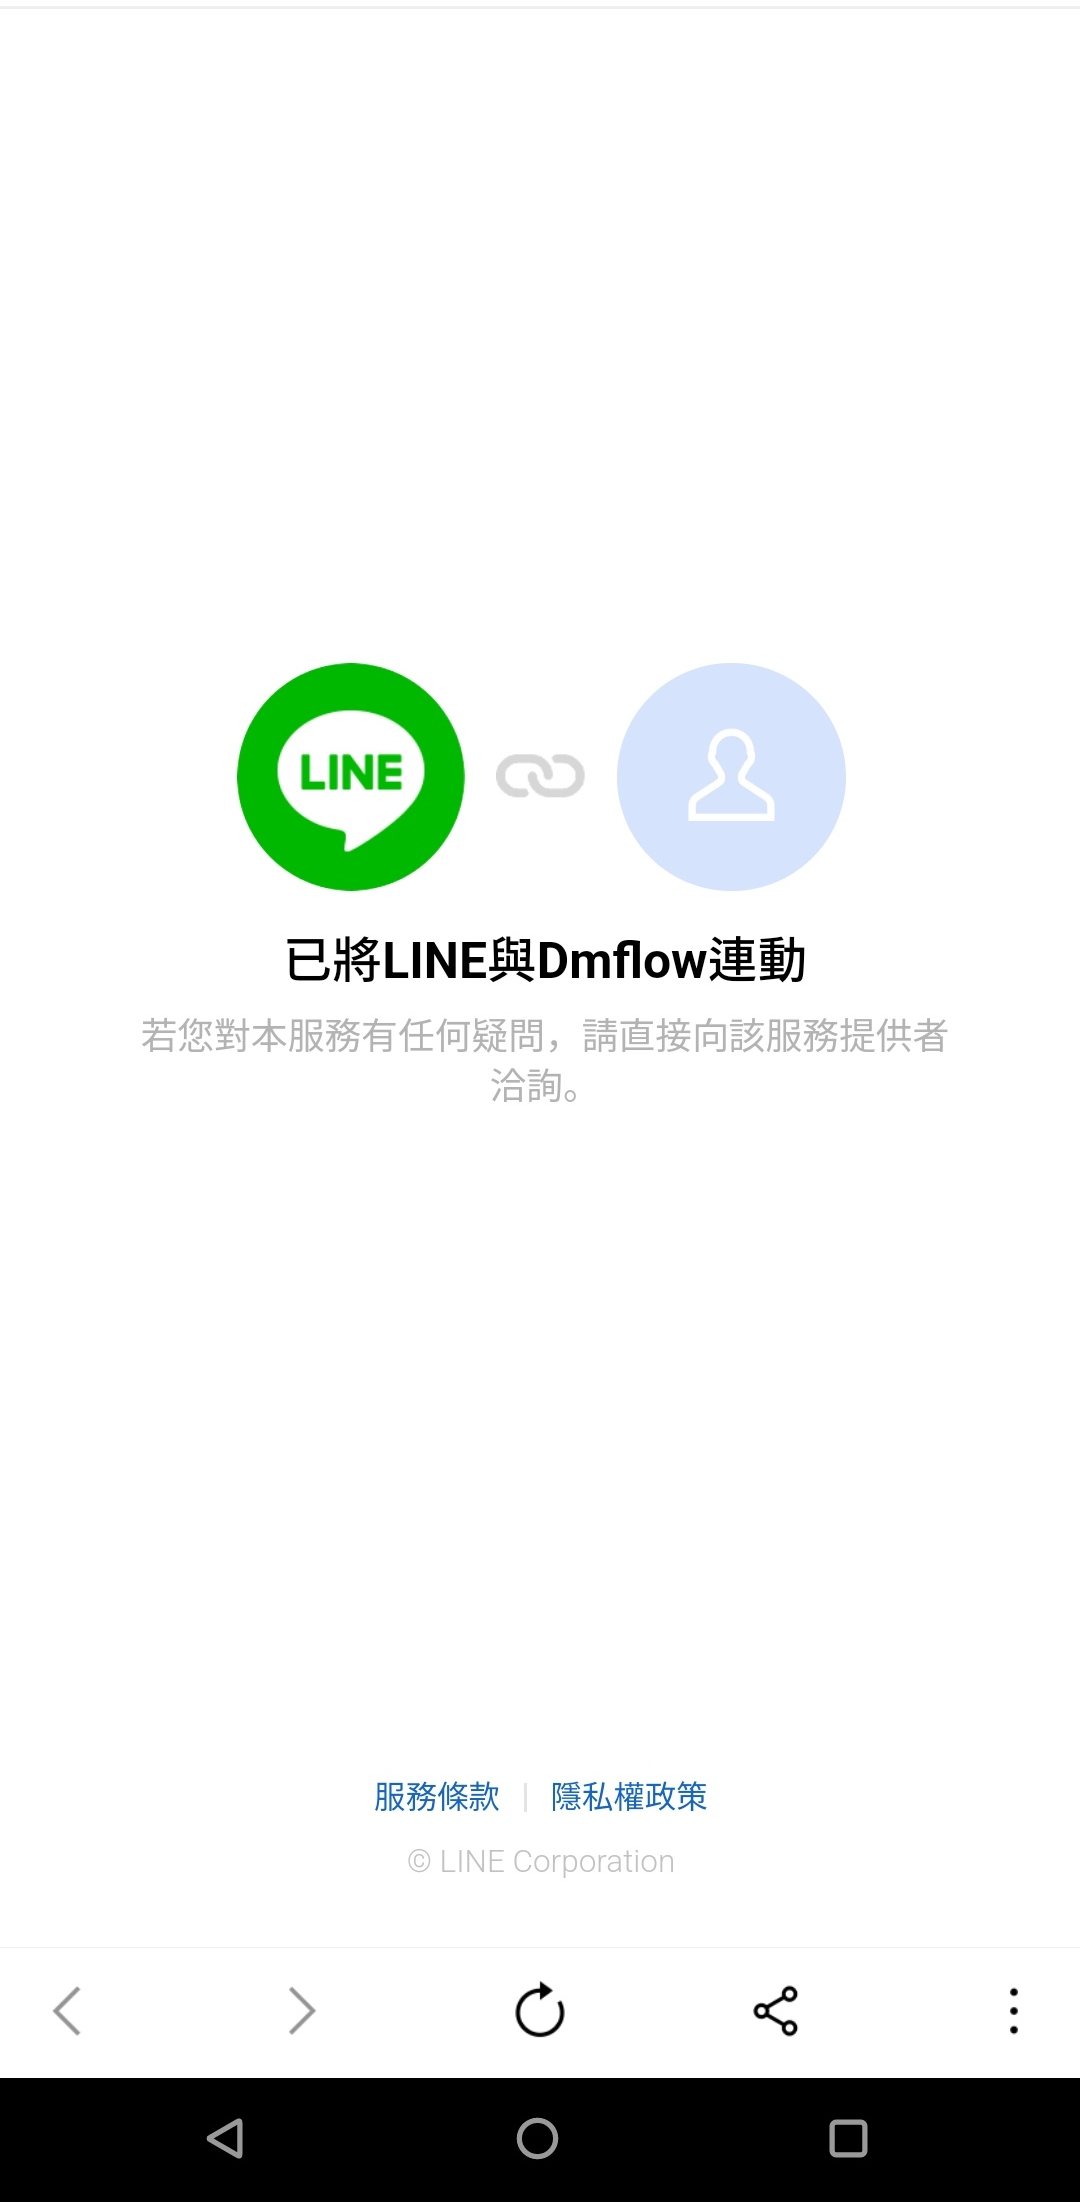
點完連結後,會出現連接畫面,此時LINE Server會丟account Link event給DMflow,DMflow會顯示以綁定帳號。
最後若是此範例完畢,記得管理部屬作業將該程序封存,讓程序下線,避免已經綁定信用卡的使用者造成不必要的費用問題。
聯絡資訊
DMflow.chat 官網: DMflow.chat (於2024-05-18更改網域至DMflow.chat,此文檔將不再維護請至DMflow.chat文檔查看新版文檔)